No planning component is more influential in defining the personality of your wedding more than planning your printable pieces. With the average wedding, up to six pieces are designed and used to correspond with guests throughout the months leading up to the wedding. The day of, an additional six pieces could be used to provide additional direction. It is imperative to have each element in place as guests are invited and welcomed at your wedding. Here is a list of the most sought after materials, when they should be designed, and how they should be displayed.
Save-the-Dates
The purpose of sending save-the-dates is to inform family and friends that you recently got engaged. Yes, most people will already know of your engagement due to social media, but for the old-timers and those that weren’t reading their news feed the day of your online announcement, you can keep them in the loop in this way. While save-the-dates are the first impression that your guests will receive, it traditionally has a more casual touch than the paper materials that come later in planning. Whether you do a postcard-sized design, a magnet, or an online version is up to you. However, the one mandatory inclusion is the chosen wedding date when planning your printable materials. The more time you can give your guests to plan on attending your wedding, the better. So, begin designing your save-the-dates as soon as you have determined the date of your wedding. If you want to include an engagement photo in the design, then be mindful of allowing yourself an extra month and a half ahead of time to have your photos taken, edited, and returned to you by your photographer. Save-the-dates should be delivered no anywhere from 6 to 8 months prior to the wedding.
Invitation Suite
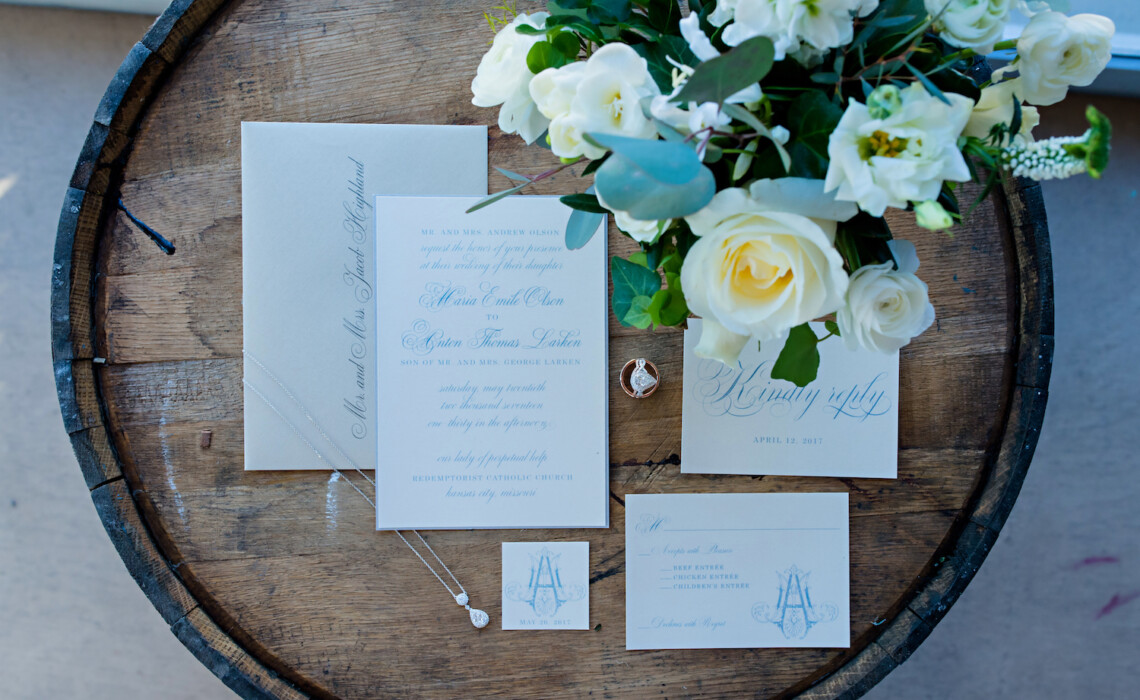
The largest collection of printed materials you will design for the wedding will combine to form the invitation suite. These items include: the invitation to the wedding, the RSVP card and pre-addressed envelope, the information card, and the outside envelope to hold it all together for mailing. The invitation suite is the first indication to guests of the formality of the wedding. It is chockfull of information and details for all to know and use as they plan to attend. You should begin pulling together the information, colors, and design of the invitations 4 months prior to the wedding. After final approval, the invitation suite should be printed, addressed, stuffed and mailed out no later than 2 months prior to the wedding.
- Invitation: the wedding invitation should reflect the look of your wedding: formal, casual, modern, rustic, etc. It should also include your names, date and time of the wedding, and the venue’s name and address. It is up to your discretion whether to indicate if there is to be a reception following or if it is an adult-only affair.
- RSVP Card: the RSVP card allows guests to communicate back to you if they plan to attend or not. Be sure to list a “respond by” date so that guests are punctual in returning their reply. Depending on the details decided elsewhere when planning your printable materials, you may wish for guests to designate their meal choice for dinner and if they have any dietary requirements. The RSVP card should be accompanied with a pre-addressed and stamped envelope to make it easy for your guests to reply.
- Information Card: utilizing an information card insert to go along with your invitation is an effective way for you to communicate all other pertinent wedding details to your guests. You could include information regarding hotel accommodations, shuttle service and times, directions to the venue, and your wedding website url.
- Envelope: to hold it all together is the outside envelope. There are many ways that you can design the colors, font, and even the inside lining to match your wedding’s theme. You want to make sure that a fully completed envelope is weighed at the post office to ensure that you have purchased enough postage.
Rehearsal
The rehearsal invitation includes the information regarding the ceremony rehearsal and the rehearsal dinner. This invite would only be mailed to those that need to attend the rehearsal to practice what will be needed of them the following day at the actual wedding. It is polite to welcome their spouse and children to join. The details of the invitation should include the venue, address, and starting time of both the ceremony rehearsal and the subsequent dinner when planning your printable materials. You should begin pulling together the details and the design 2 months prior to the wedding so that the printed materials are ready to mail out 1 month prior to the big day.
Wedding Day Materials
On the wedding day, you will be relaxing with your friends, getting ready to say your vows to your best friend, and celebrating the night away with those closest to you. And all the while, there will be materials that you designed and put together before the big day that will look cohesive to your wedding style and will help everything run more smoothly. All-in-all it depends on the style of your wedding to determine which signs you want to make and others that you want to pass on. Here are some ideas that you can browse from:
- Guest Book Sign: a traditional sign could read, “Please sign our guestbook” or you can make it more interactive by asking for advice, “Advice and wishes for the new Mr. & Mrs.”
- Gift Table: it is always best to have a designated table for cards and gifts. Pair your sign with an engagement photo to add a personal touch.
- Programs: having programs available at the entrance of your ceremony gives guests the insight to the flow of the wedding, the names of the bridal party standing beside you and other details you include, such as an “In loving memory” section or a “Thank you” note.
- Table Numbers: assigning numbers to each table will allow you to begin arranging guest seating. It also helps caterers with table service and designates special tables for your immediate family.
- Seating Assignment Sign or Placecards: a large assignment sign or place cards can help your guests locate which table they will be seated at during the reception.
- Menu: sharing the menu you have chosen with guests is an excellent way to get them excited for dinner!
- Bar Sign: be sure to explain to guests what is available at the bar and if it is complimentary or for cash.
Like “Planning Your Printable Pieces” and want to see more? Continue reading planning ideas here.